How to Download and Install Citra Emulator on Windows?
Follow these quick steps to download and install best 3ds emulator for pc Citra Emulator on your Windows PC without any confusion. The process is simple, fast, and works on most modern systems.
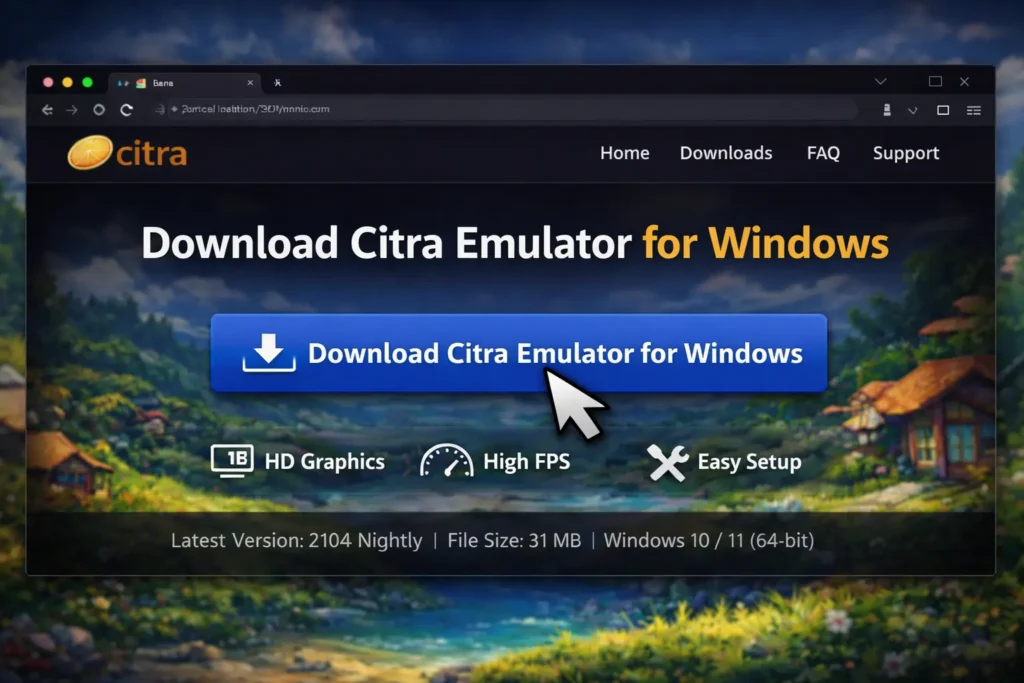
Step 1: Download Citra Emulator
Click the Download Citra Emulator for Windows button available on this page. The installer file will start downloading automatically to your computer.
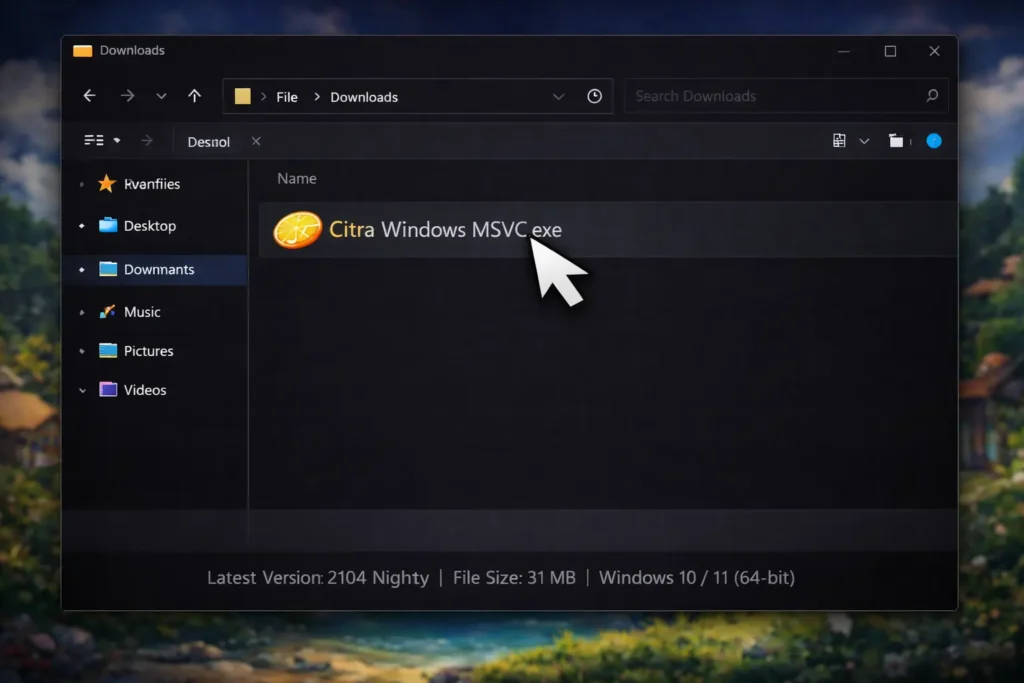
Step 2: Open the Installer File
Once the download is complete, open your Downloads folder and locate the Citra Windows MSVC (.exe) file. Double-click the file to begin the installation process.
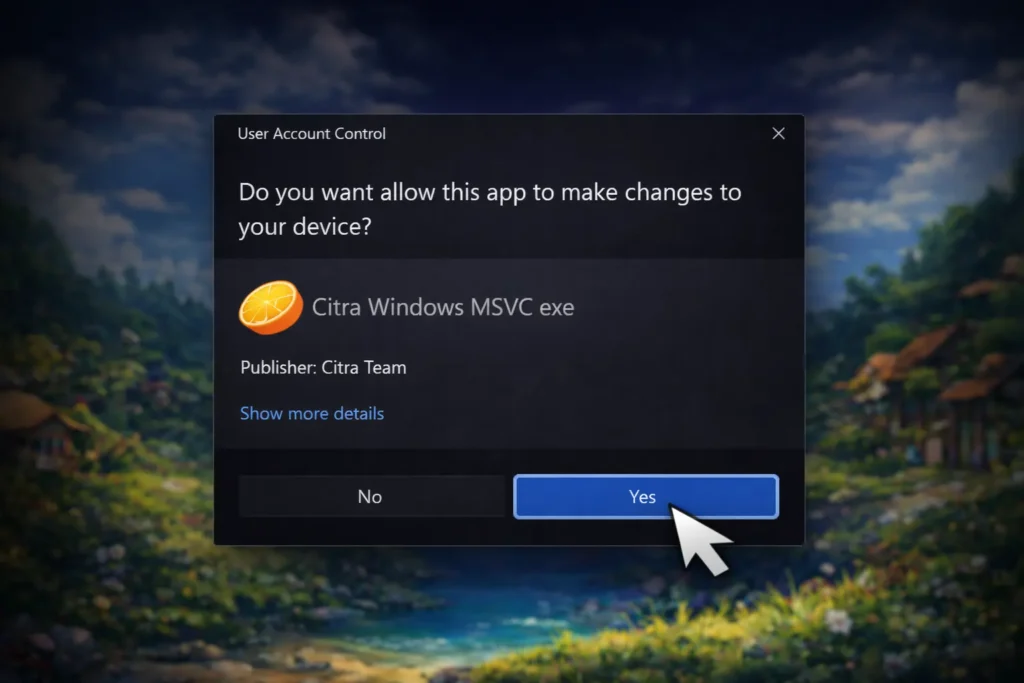
Step 3: Allow Installation Permissions
If Windows shows a security or permission prompt, click Yes to continue. This allows the installer to make the required changes to your system.
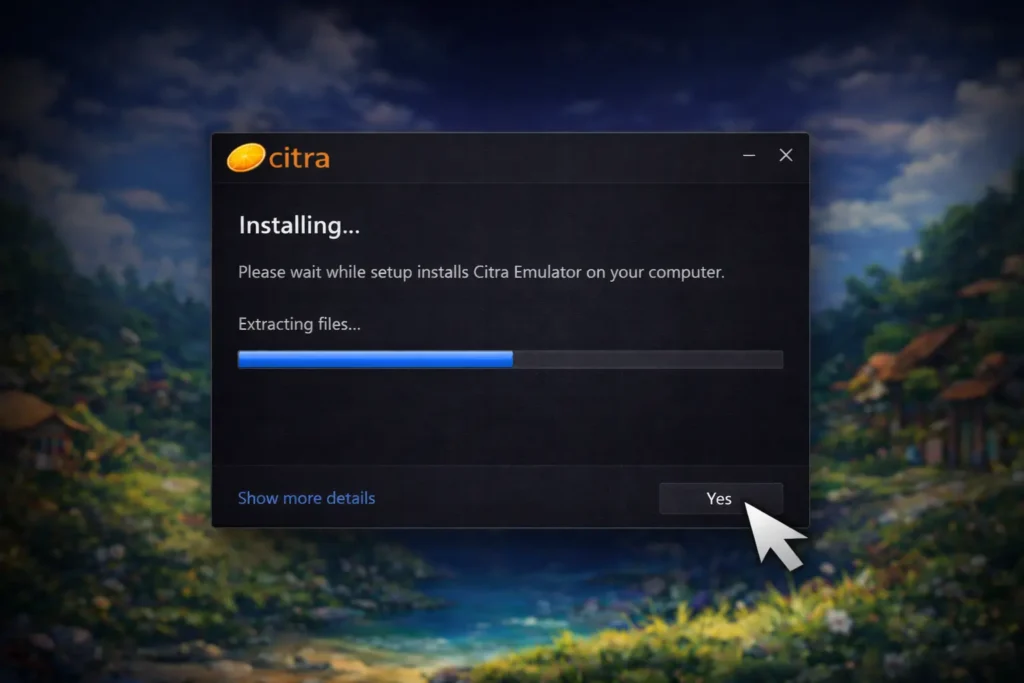
Step 4: Complete the Setup Process
Follow the on-screen instructions shown by the setup wizard and wait for the installation to finish. The setup usually completes within a minute.
Step 5: Launch Citra Emulator
After the installation is complete, open Citra from your desktop shortcut or the Start Menu. The emulator will launch successfully and is now ready to use.
How To Build citra from Source? (Advanced Users Only)
Building Citra from source is recommended only for advanced users or developers who want custom builds or development access. Most users do not need to build from source and can use the precompiled Windows version instead.
What You Need Before Starting
Make sure the following tools are installed on your system before building Citra from source.
Visual Studio 2022
Visual Studio 2022 is the main development environment used to compile Citra on Windows. During installation, select Desktop development with C++ to enable the necessary build tools.
CMake
CMake is a build configuration tool that prepares project files for Visual Studio. It is used to generate Visual Studio project files from the source code. Without CMake, the build process cannot continue.
Citra Source Code
The source code contains all the files needed to build Citra manually. You can choose between:
An older source version for compatibility or testing
After downloading, the source code must be extracted to a folder on your PC before using it with CMake.
Step 1: Prepare the Source Code
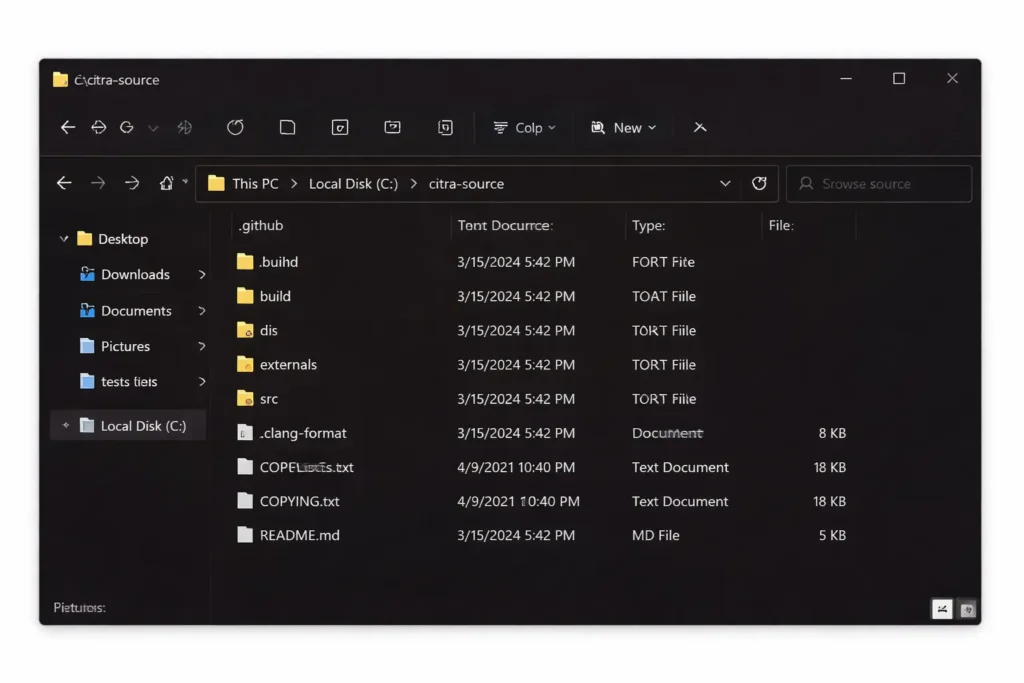
First, download the Citra source code and extract it to a simple folder location on your PC. Using a clean path like C:\citra-source helps avoid build errors caused by spaces or special characters.
✔ At this stage, your source folder should contain files such as src, externals, and CMakeLists.txt.
Step 2: Open CMake and Select the Source Folder
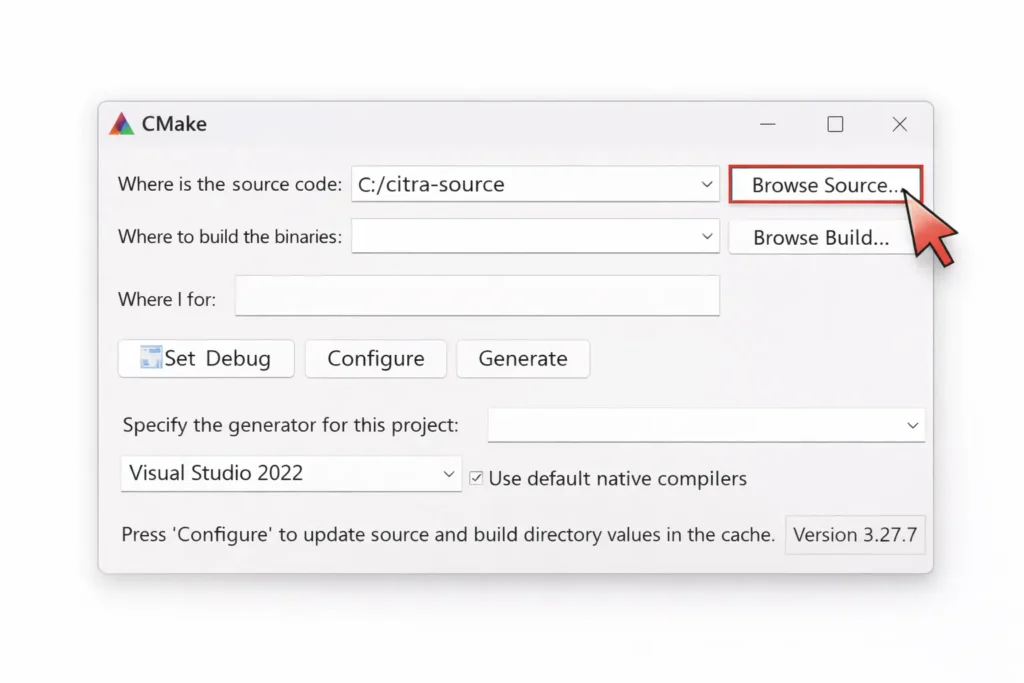
Launch CMake and use the Browse Source option to select the folder where the Citra source code was extracted. This tells CMake where the project files are located.
✔ CMake should now display your source path in the “Where is the source code” field.
Step 3: Create and Select a Build Folder
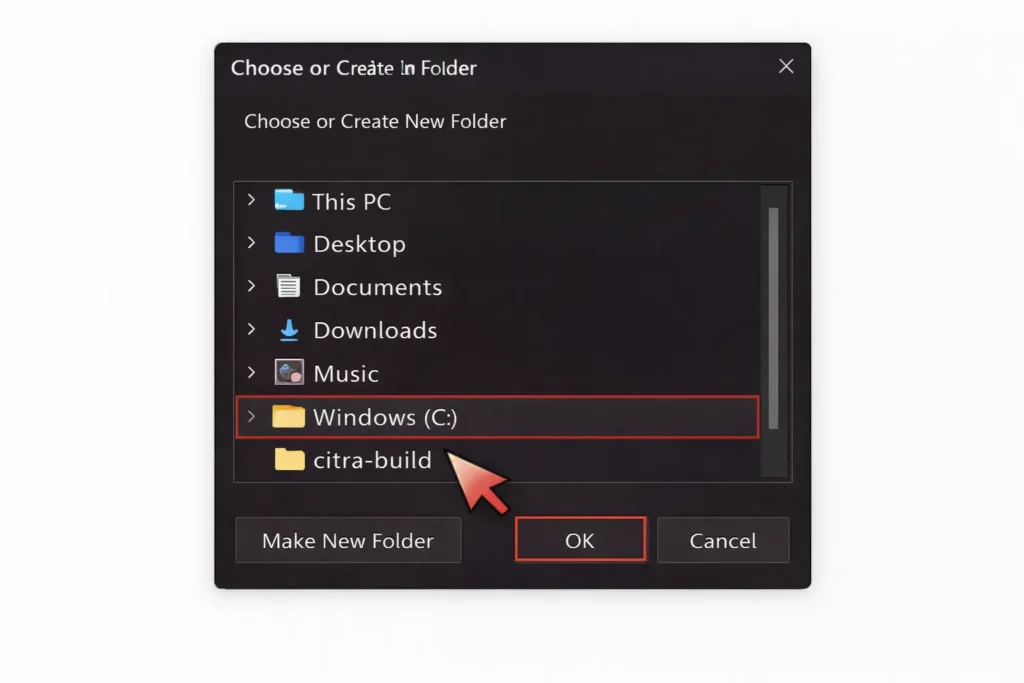
Next, choose a separate empty folder for the build files using Browse Build. You can create a new folder such as C:\citra-build when prompted.
✔ Keeping source and build folders separate is required for a clean and stable build.
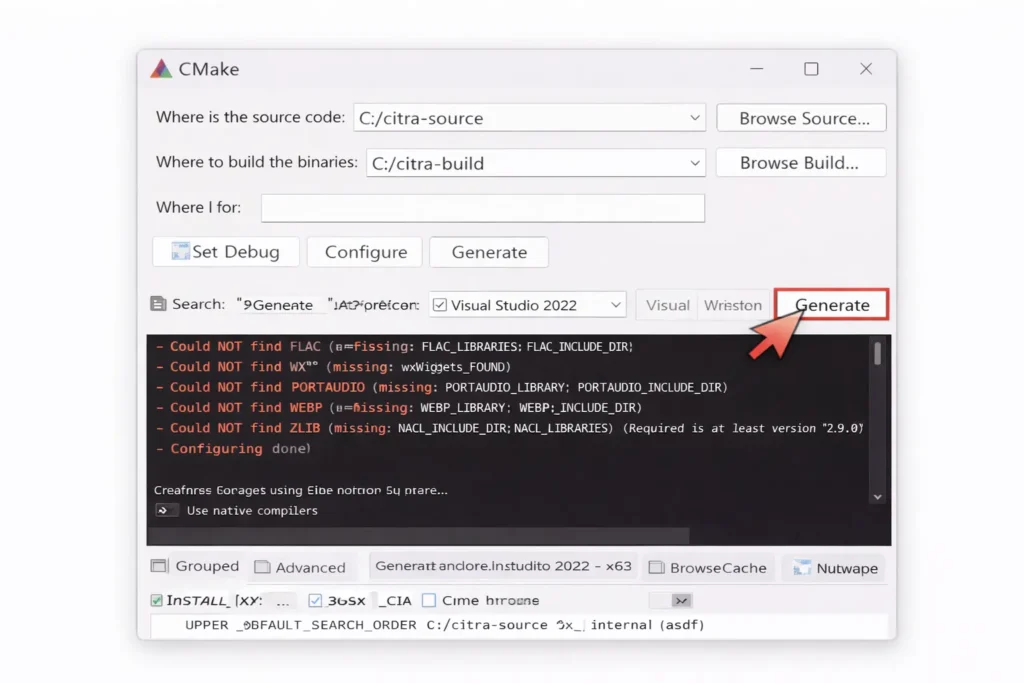
Step 4: Generate Visual Studio Project Files
Select Visual Studio 2022 as the generator in CMake and keep default settings enabled. Click Configure, wait for the process to complete, then click Generate.
✔ Once finished, CMake will create Visual Studio project files in the build folder.
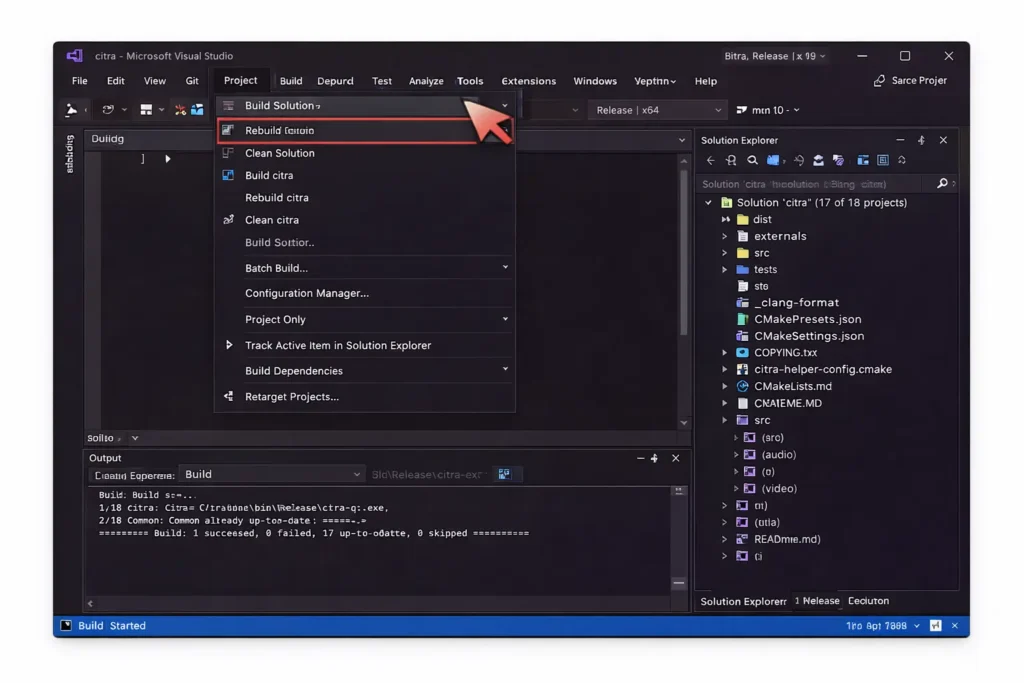
Step 5: Build Citra Using Visual Studio
Open the generated Visual Studio solution (.sln) file from the build folder. Set the build configuration to Release, then click Build Solution to compile Citra.
✔ If the build completes successfully, the Citra executable will be generated inside the build directory.
Citra Emulator offers a reliable way to run Nintendo 3DS games on Windows with improved performance and graphics. Whether you choose the prebuilt version for quick setup or build Citra from source for advanced use, this guide covers everything needed to get started. Follow the steps carefully, use the recommended system requirements, and enjoy a smooth emulation experience on your PC.
Yes, Citra works on Windows 10 and Windows 11 (64-bit). Most modern PCs can run it smoothly with proper settings.
Yes, Citra is still available for PC and can be used on Windows systems through supported builds and source compilations.
A minimum of 4 GB RAM is required, but 8 GB or more is recommended for smoother performance and better stability.
Yes, Citra can run many games at 60 FPS on capable hardware with optimized graphics settings.
Yes, Citra can be built from source on Windows using Visual Studio 2022 and CMake. This method is mainly used by advanced users and developers.
The prebuilt version is ready to use and easier for most users, while a source build allows customization and development changes.
After a successful build, the Citra executable is created inside the build folder, usually under a Release directory.
Warnings usually appear when optional dependencies are missing. Critical errors indicate missing required tools or incorrect configuration.